Whether you're a first-time DIY builder or looking to upgrade your cooling system, this tutorial will walk you through the installation process using an Intel 1700 socket and the darkFlash DXv2.6 360 AIO cooler.
Step 1: Gather the Necessary Components
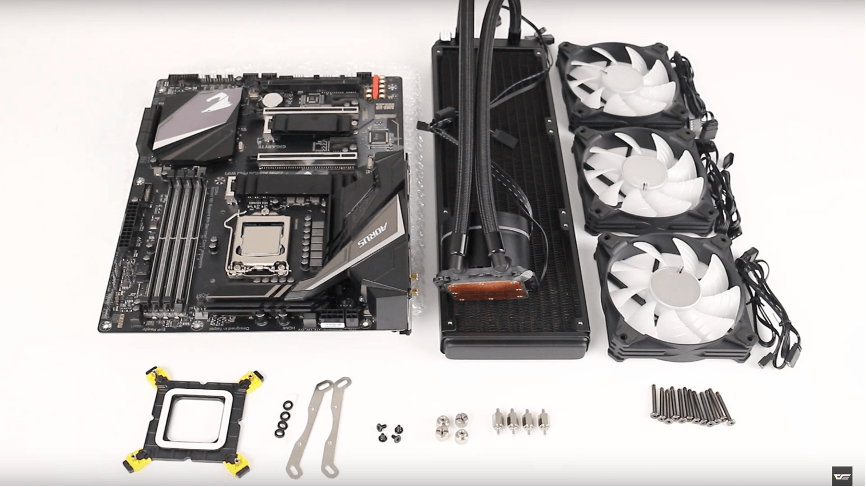
The following image shows all the parts you’ll need for the AIO water cooler installation. From left to right in the first row: motherboard, radiator, and fans. In the second row: backplate, spacer washers for the standoffs, mounting bracket for the CPU cooler, cooler screws, nuts, standoffs, and fan mounting screws for the radiator.
Step 2: Install the Mounting Bracket
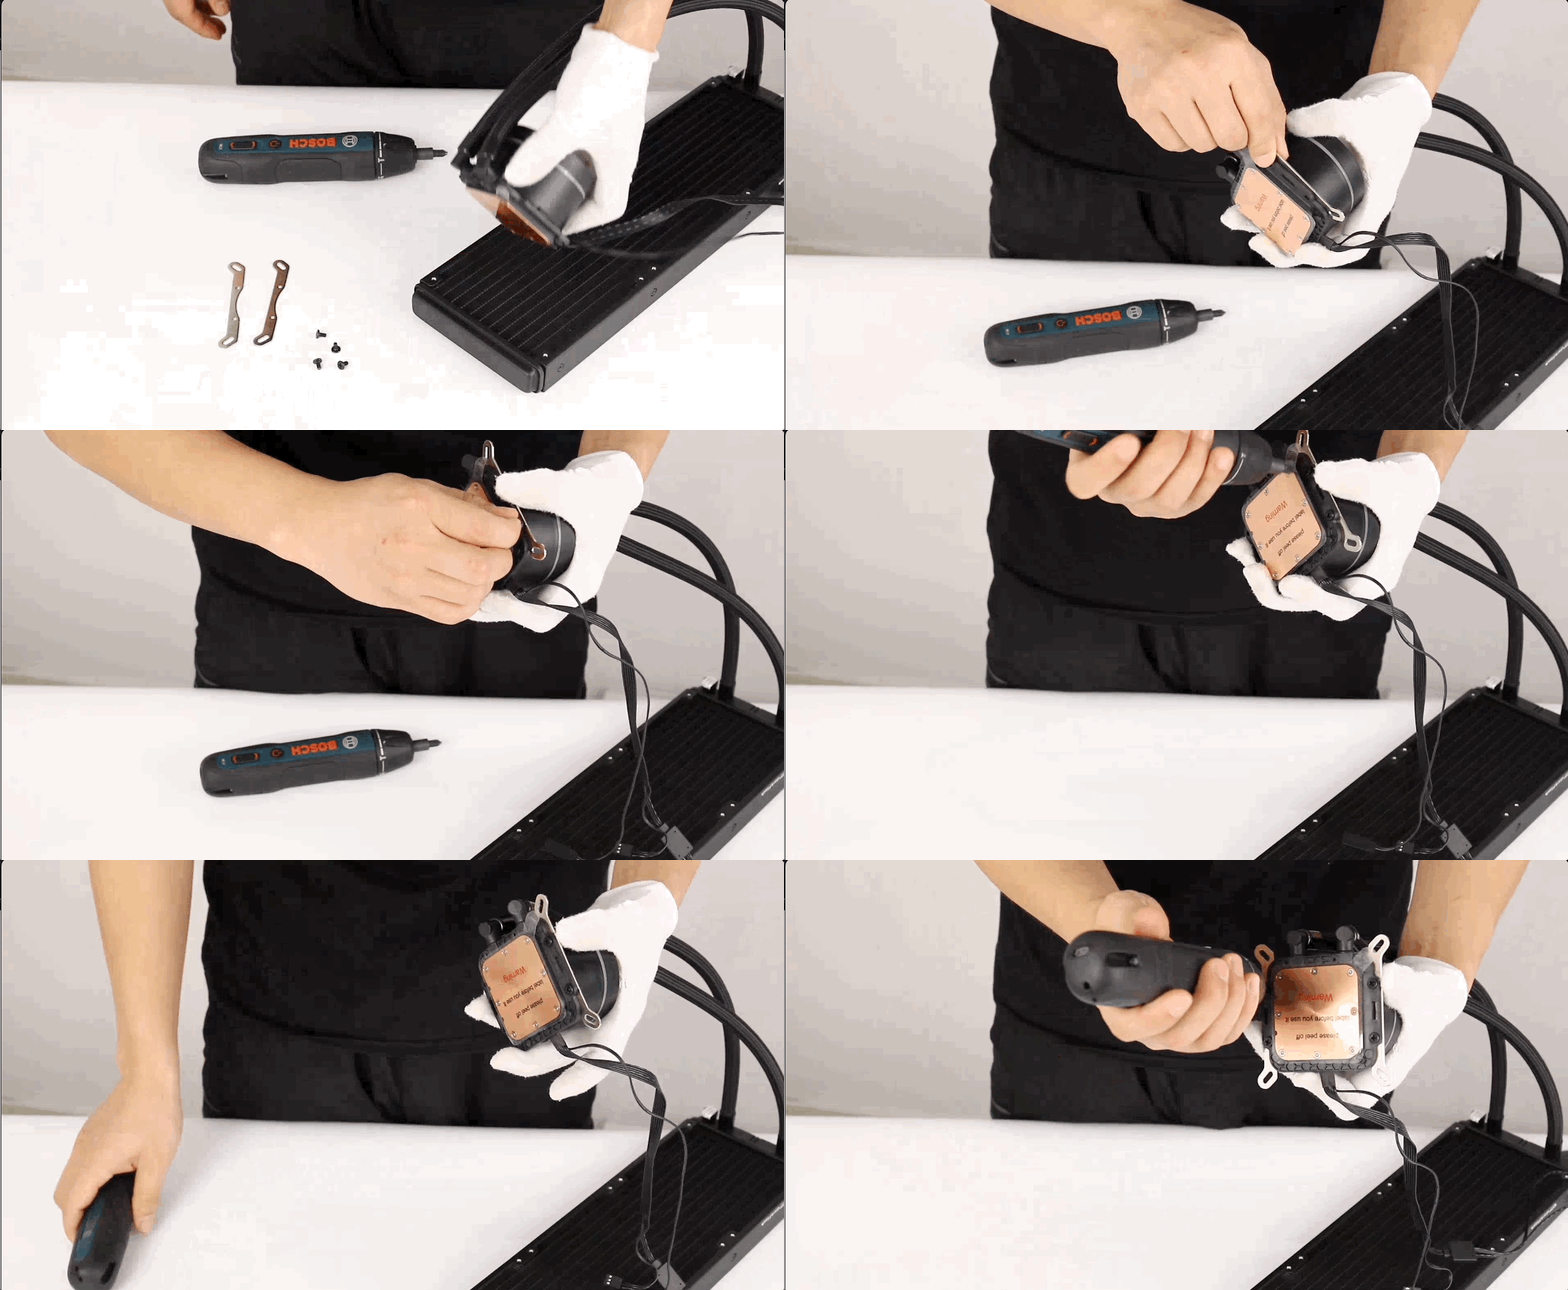
Start by attaching the mounting bracket to the cold plate (the part of the cooler that makes contact with the CPU). This bracket is crucial for securing the cooler properly onto the CPU socket.
Step 3: Install the Fans on the Radiator
Next, attach the fans to the radiator. Make sure to align them correctly for airflow, and secure them with the provided screws. This step ensures that your cooler will provide efficient airflow and cooling.
Step 4: Install the Backplate
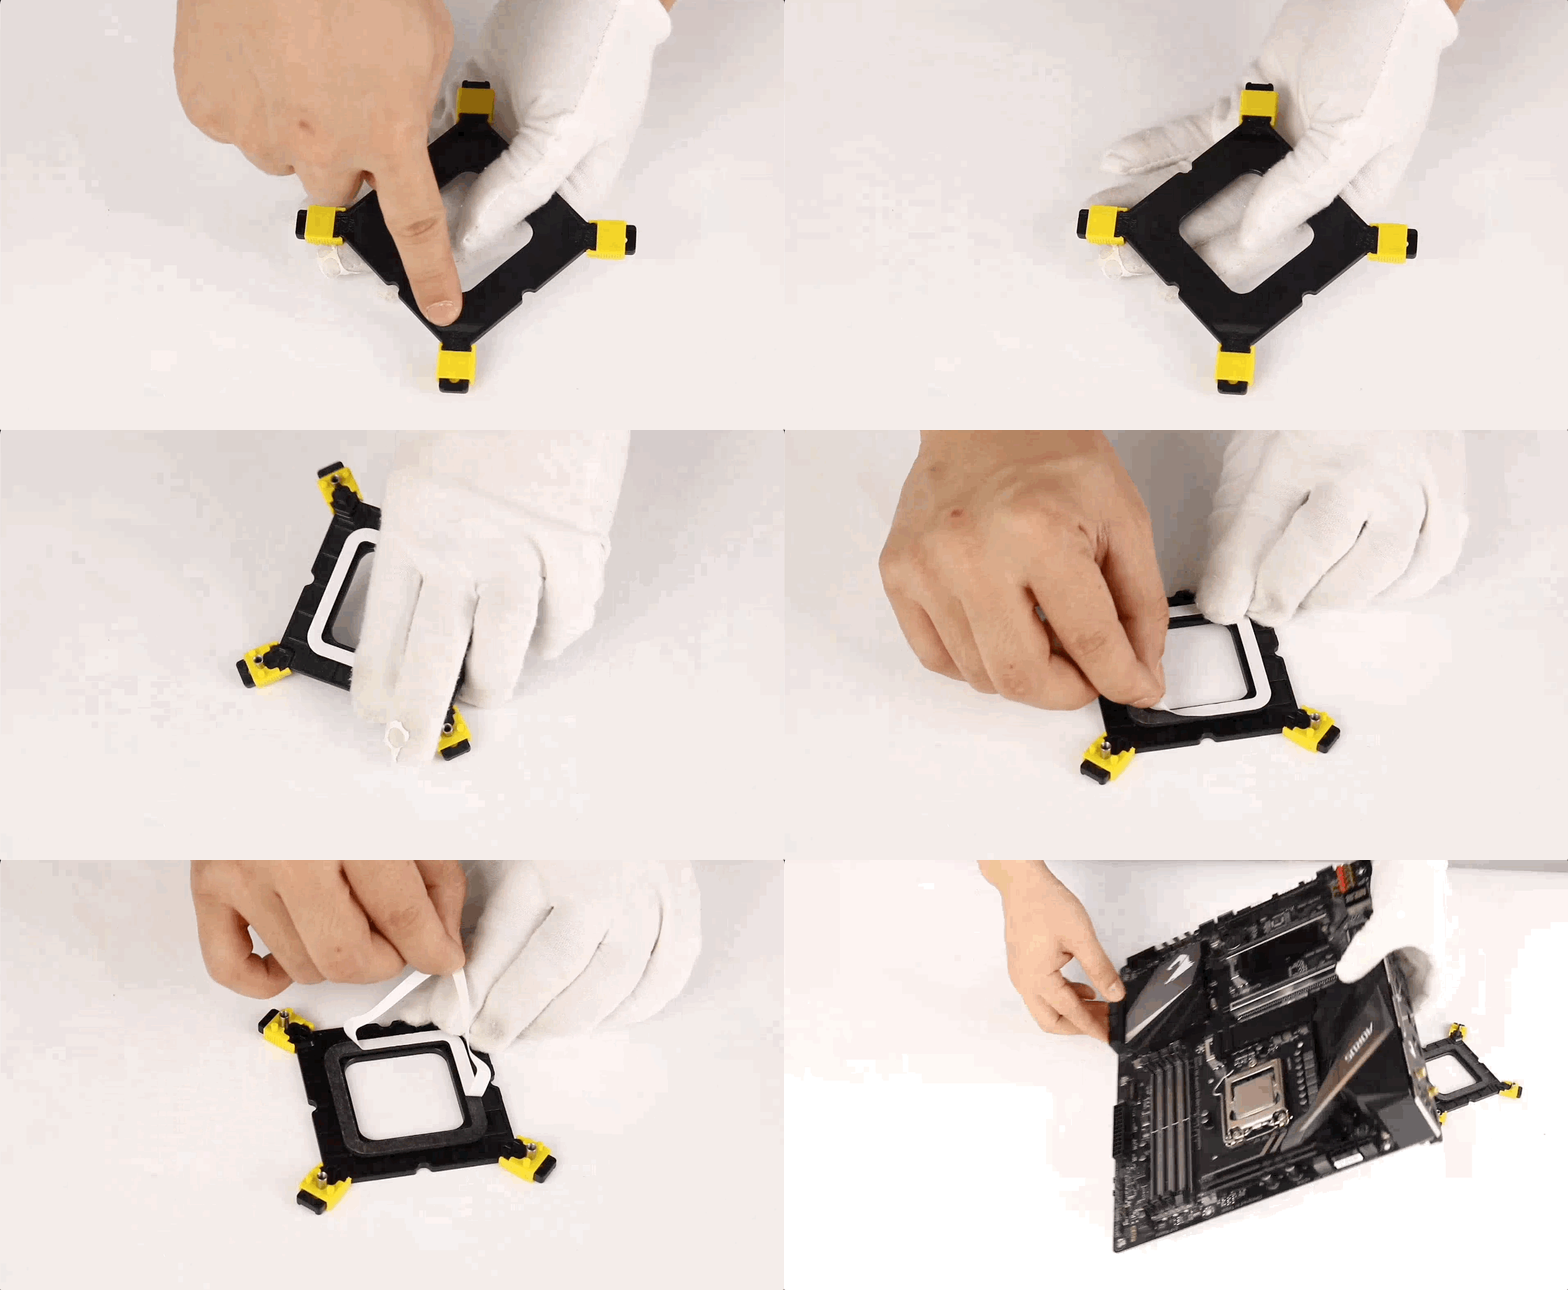
Adjust the mounting backplate to match the Intel 1700 socket, making sure that the yellow plastic tabs are aligned with the correct mounting holes. Peel off the protective backing from the adhesive side to secure the backplate in place.
Step 5: Position the Backplate
Align the mounting backplate with the standoff holes on the motherboard and attach it securely. This step ensures that the cooler will sit properly on the CPU socket.
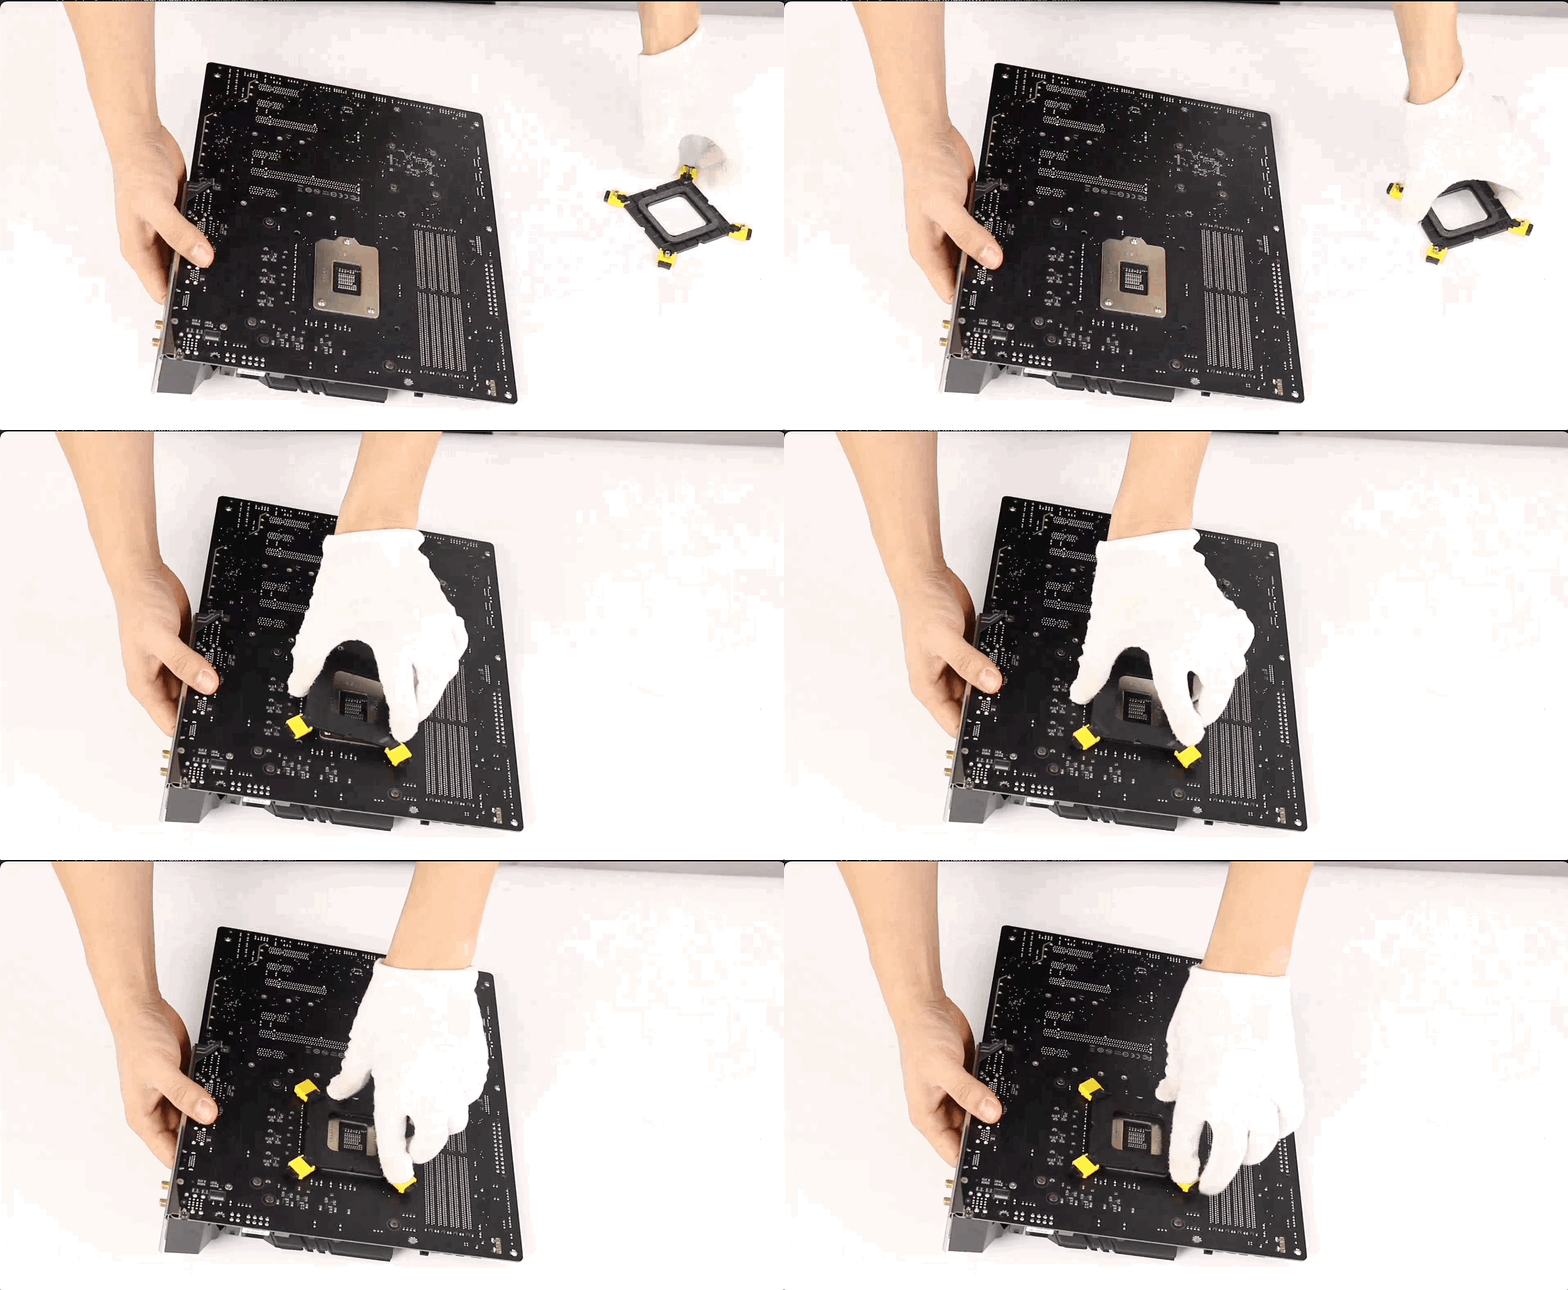
Step 6: Install the Spacer Washers on the Standoffs
Place the spacer washers onto the standoffs.
*Note that standoffs have a specific orientation, so make sure to install the spacer washers on the side with the raised edge.
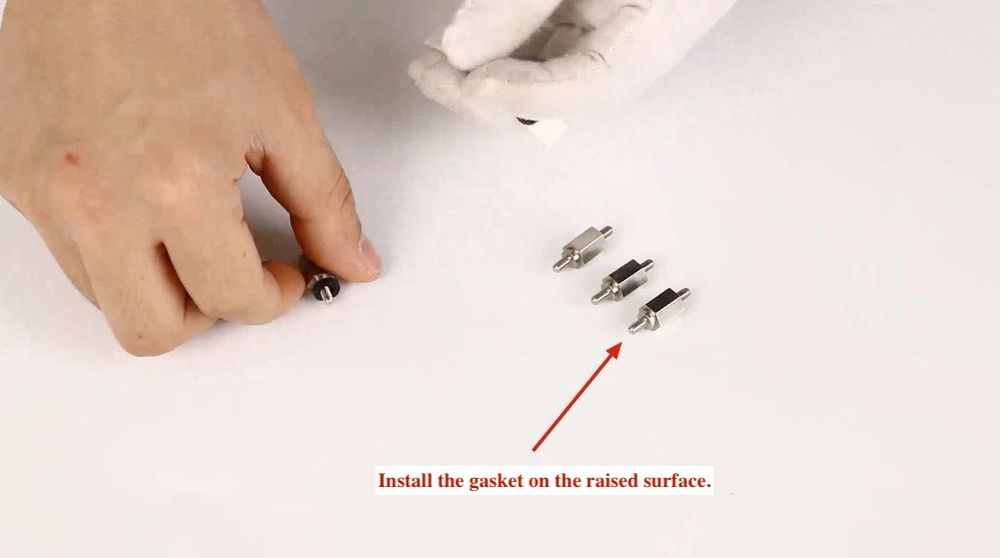
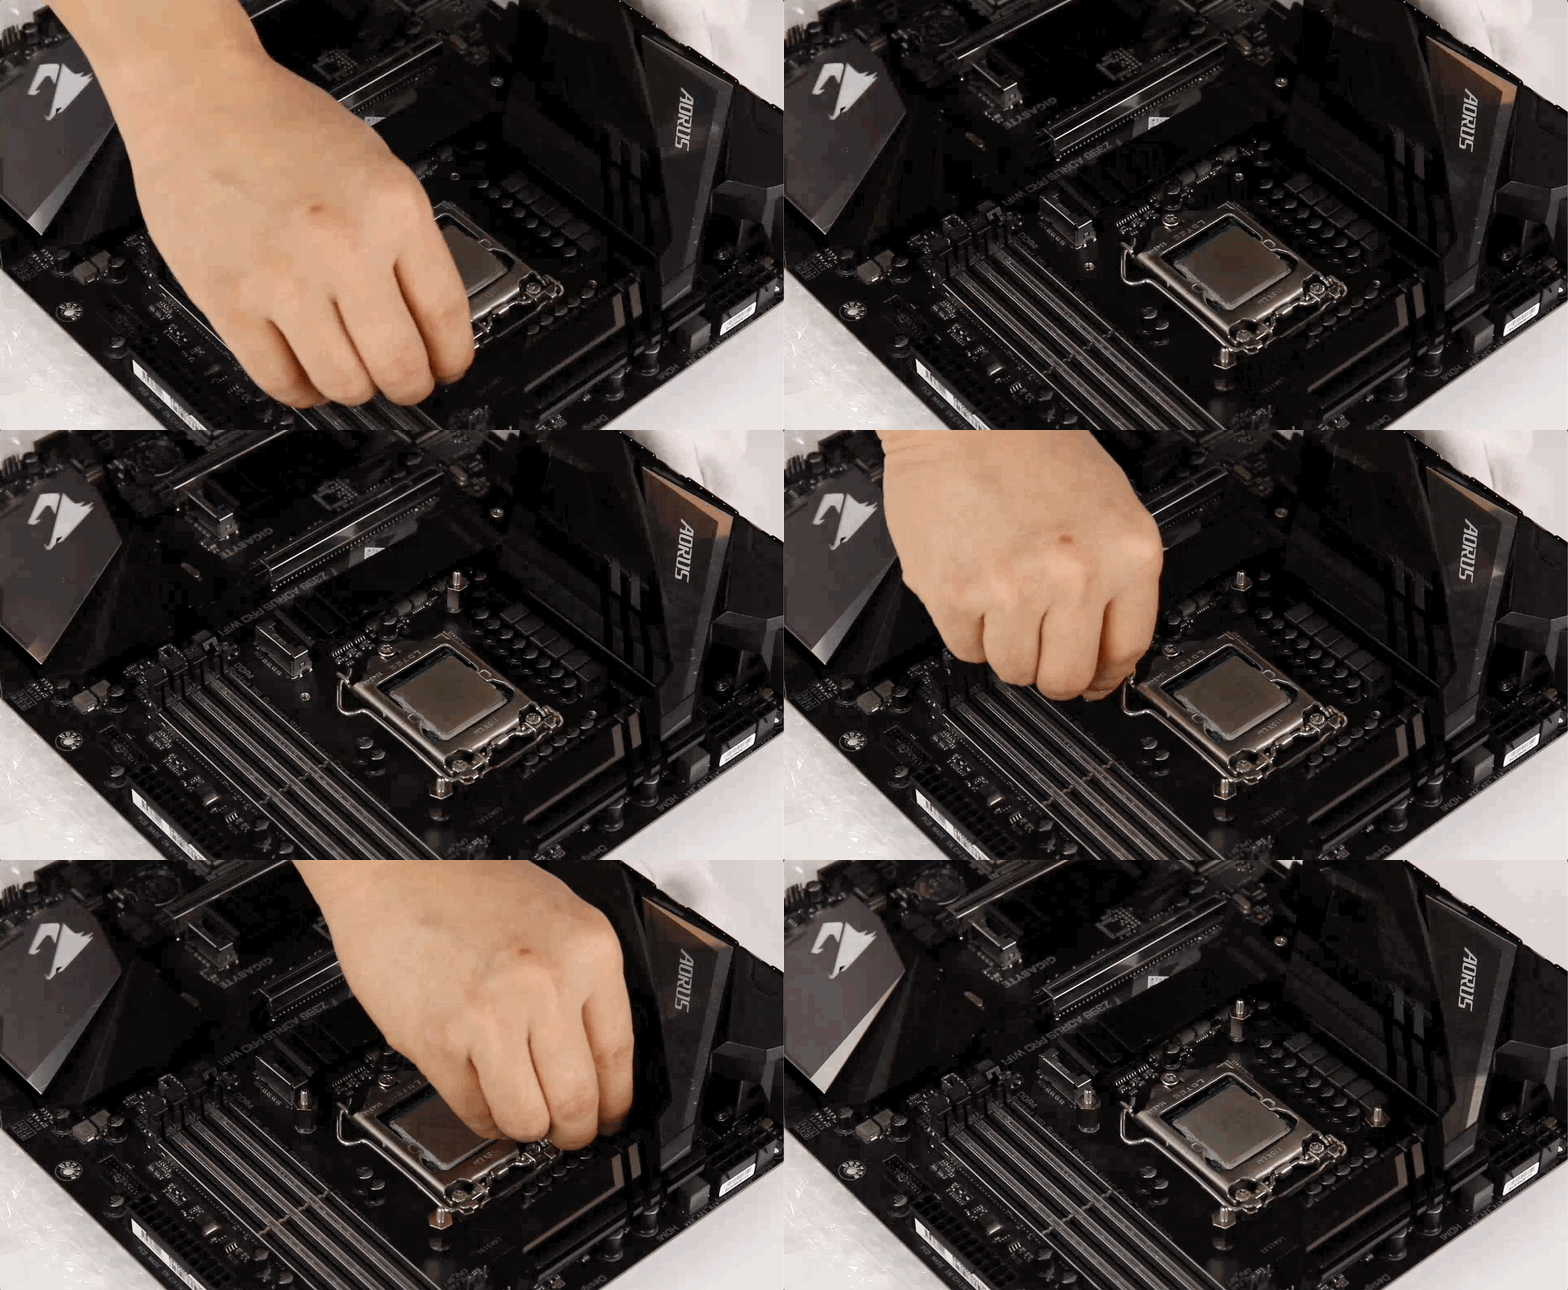
Step 7: Secure the Standoffs
Install the standoffs into the four screw holes on the mounting backplate. Ensure that the raised side of the spacer washers faces toward the motherboard, as this is essential for proper installation.
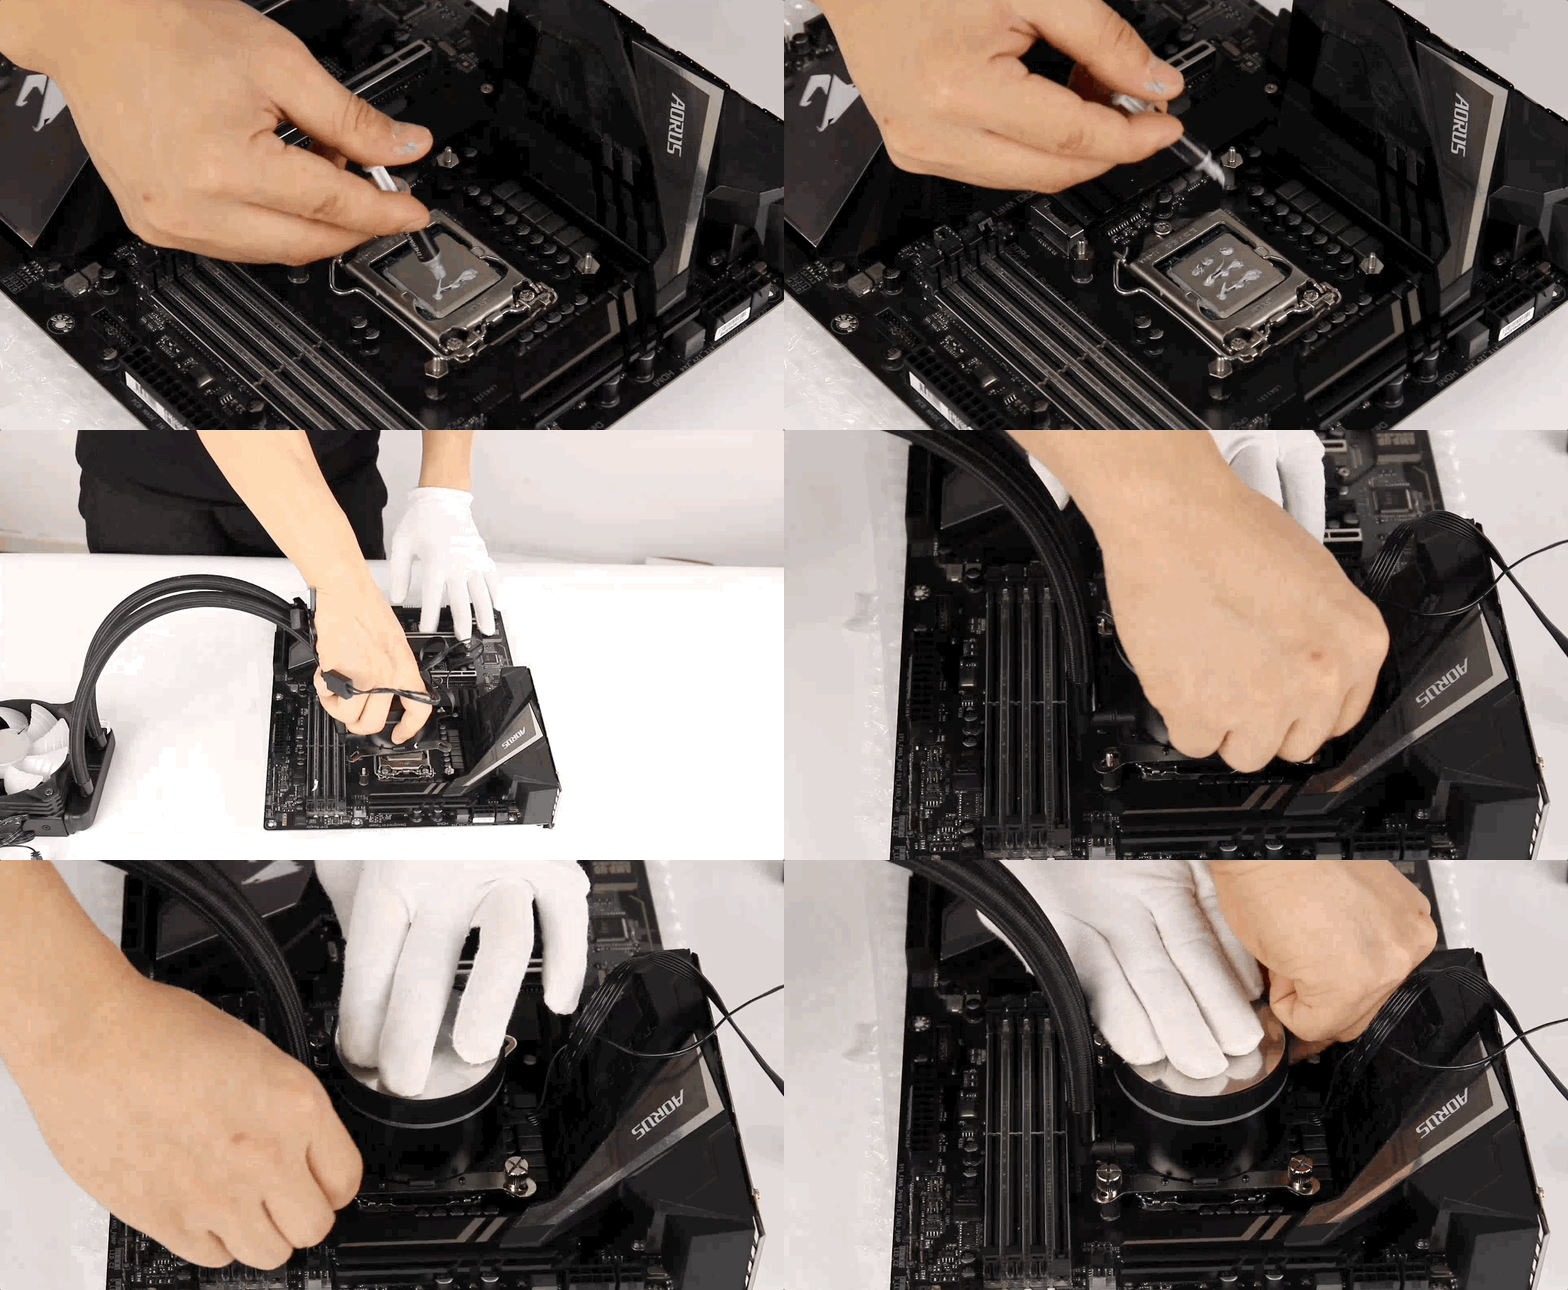
Step 8: Apply Thermal Paste and Install the Cold Plate
Before installing the cold plate, apply thermal paste to the CPU. Once the paste is applied, position the cold plate (with the copper base) directly on top of the CPU. Secure it in place with the provided nuts.
Tip: Don’t forget to peel off the plastic cover from the bottom of the cold plate before installation. Failing to do so will prevent the cooler from properly transferring heat from the CPU.
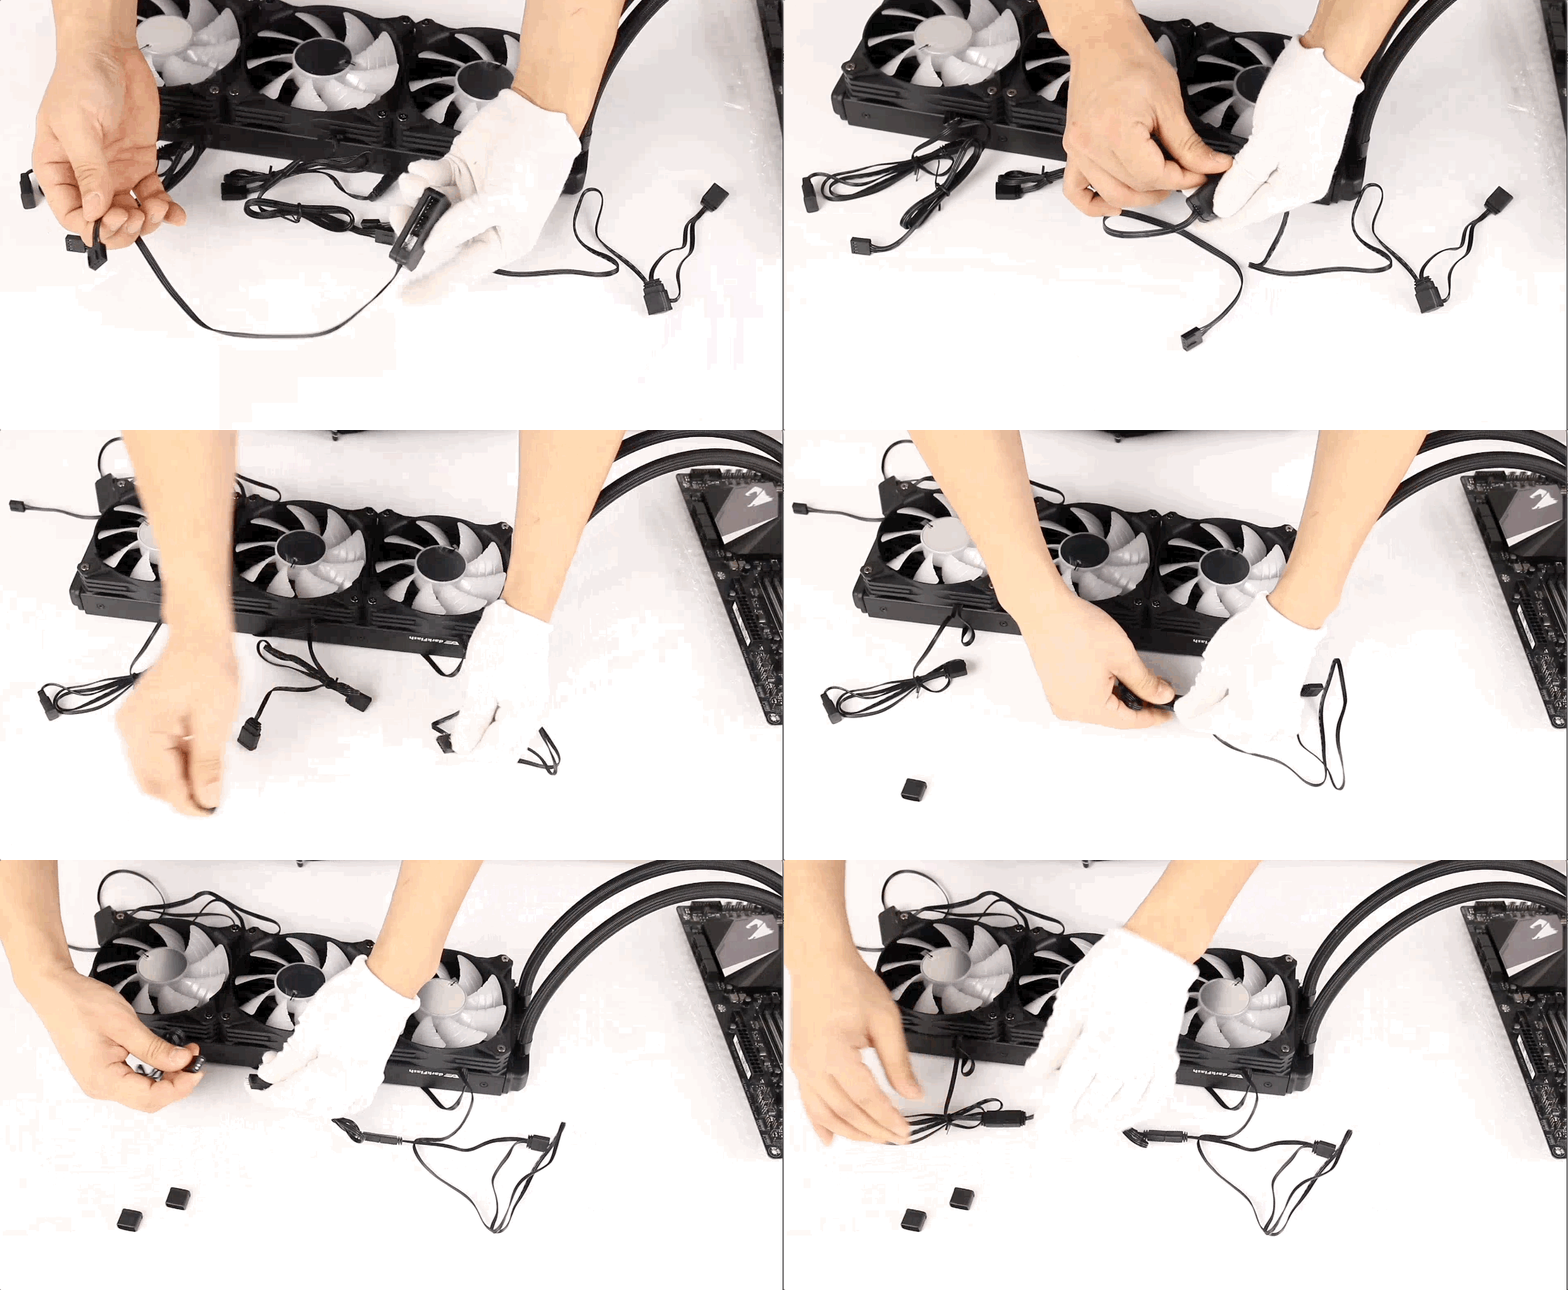
Step 9: Connect the Fan Wires
Now, connect the fan wires. The PWM and 5V 3-pin connectors on the radiator fans should be linked together. This ensures that the fans can be controlled efficiently by your motherboard or cooling controller.
Step 10: Connect the Cold Plate Wires
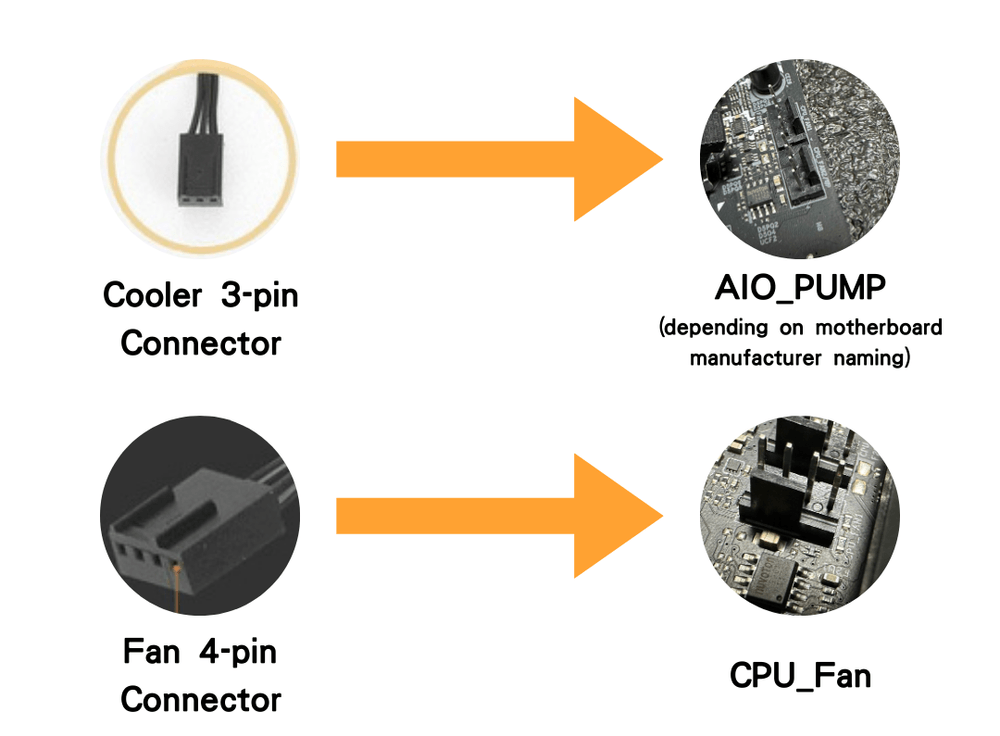
Connect the PWM cable from the cold plate to the "AIO_Pump" header on the motherboard. Then, connect the radiator fans to the "CPU_Fan" header on the motherboard.
Step 11: Connect the ARGB Wires
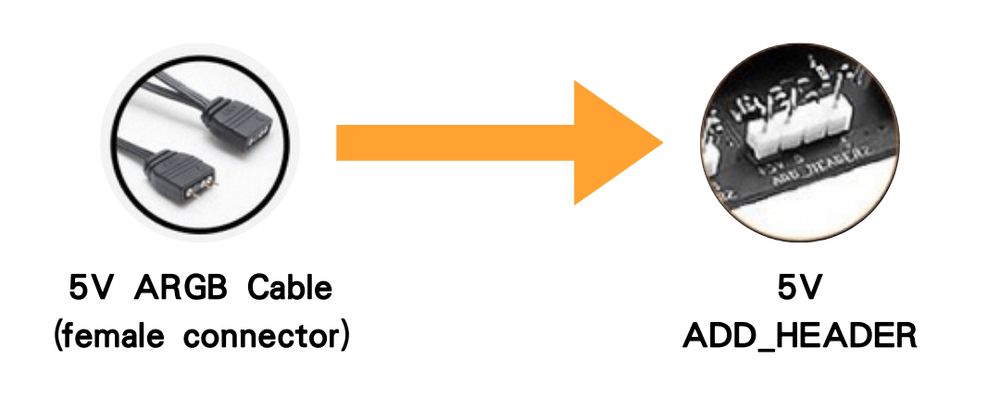
Lastly, link the 5V 3-pin ARGB connectors from both the cold plate and the fans. These should be connected to the 5V ARGB header on the motherboard to enable lighting control.
Step 12: Power On and Test
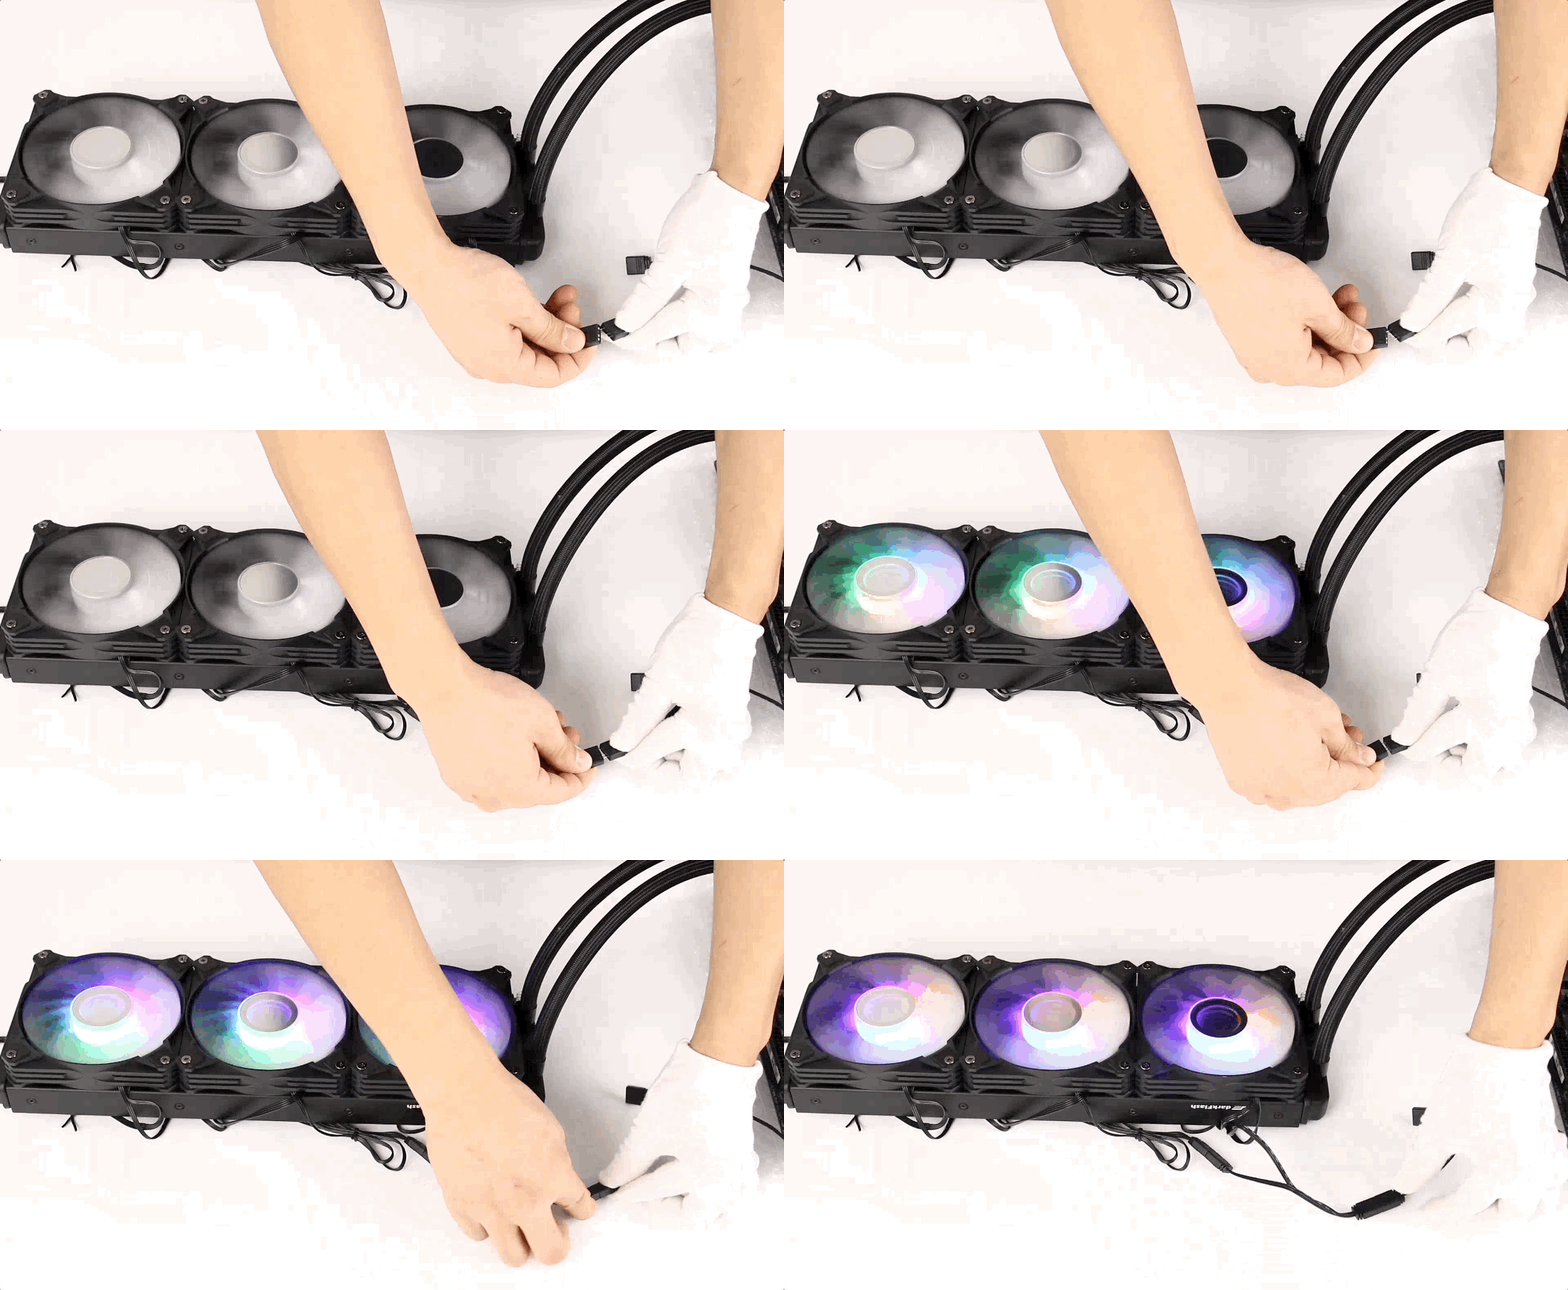
Once everything is connected, power up your system and check whether the cooler and all components are functioning correctly. Make sure the fans are spinning and the ARGB lights are working as expected. Also, monitor temperatures to ensure that your system is cooling efficiently.
And that's it! With this detailed guide, you should have successfully installed your AIO water cooler. Whether you're upgrading your PC or building from scratch, a good water cooler will significantly improve cooling performance and aesthetics. Happy building!

